AP 600 Modifications
There have been some complaints (many of them from me) about how one clamps the azimuth axis on the AP 600 series mounts. The clamp described on this page replaces the simple cap screw provided by AP, and has several advantages:
-
The handle is detachable, allowing you to install in the restricted space available.
-
No Allen wrench is needed in your kit for clamping the azimuth axis
-
The handle can be repositioned by lifting, without changing the tension on the clamp.
The part described in this photo sequence can be found on the . The part number is , "Die cast Zinc adjuable calmping handle with ball knob M6x1x20mm threaded studd, 40mm handle."
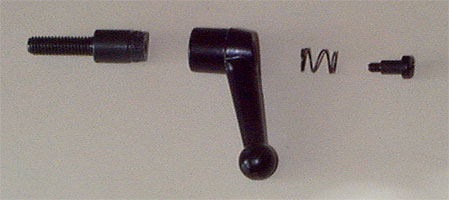
Exploded
view of clamp handle
Installing clamp handle
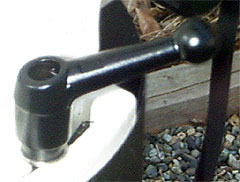
Adjusting clamp handle position
Order a set of 4 Mylar washers for $4
-
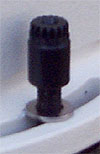
An M6x1 screw that you insert into the base of the mount in place of the screw supplied by AP. It has a crown on it that engages the handle to the right.
-
The "bat-wing" handle. It has interior notches that match the crown on the screw.
-
A spring that pushes the handle down onto the crown of the screw. This means that the handle is "normally engaged," and turning the handle turns the screw. You can lift the handle against the tension supplied by the spring, and it then turns freely for positioning.
-
A hold-down screw that goes through the spring and into the crown of the M6x1 screw.
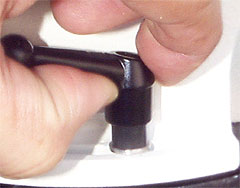
The bat-wing clamping handle.

In case you drop something, or forget to look, the smaller end of the spring goes at the top, against the head of the small screw. Tighten firmly.
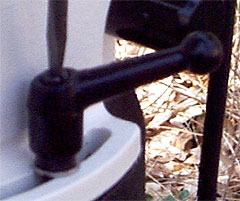
In practice, the handle turns about 180 degree, which is enough to engage/disengage the clamping action for the purpose of adjusting azimuth.
The main advantage of the detachable handle is that it allows you to attach the handle in the first place! You should rarely need to actually adjust the handle's position after initial installation.