Vixen GP-DX Mount for CCD Imaging
 I
tested the GP-DX for guided and unguided imaging with a 17-pound load. The
mount has an excellent polar scope; I can easily use it to get a good
enough alignment to get 90- to 120-second unguided images without star
trails. Tracking is smooth, despite the notorious clicking one hears about
from the SkySensor 2000 PC motors. <g> A good polar alignment is
also essential for top-notch guiding, and one should adjust various
parameters in the hand controller and camera control software to reduce
aggressiveness for best results. Maxim/DL is highly recommended for camera
control, as it provides access to a wide variety of parameters that will
help you refine your guiding accuracy. Without training PEC, I was able to
get 6 arc-second guiding accuracy, which is outstanding for a mount at
this price. If you are prepared to
invest some time and energy, you can do a lot with this affordable mount.
The SkySensor 2000 PC goto system was a joy to use; I found it very user
friendly once I figured out what and where all the available settings
were. However, you don't need it for imaging.
I
tested the GP-DX for guided and unguided imaging with a 17-pound load. The
mount has an excellent polar scope; I can easily use it to get a good
enough alignment to get 90- to 120-second unguided images without star
trails. Tracking is smooth, despite the notorious clicking one hears about
from the SkySensor 2000 PC motors. <g> A good polar alignment is
also essential for top-notch guiding, and one should adjust various
parameters in the hand controller and camera control software to reduce
aggressiveness for best results. Maxim/DL is highly recommended for camera
control, as it provides access to a wide variety of parameters that will
help you refine your guiding accuracy. Without training PEC, I was able to
get 6 arc-second guiding accuracy, which is outstanding for a mount at
this price. If you are prepared to
invest some time and energy, you can do a lot with this affordable mount.
The SkySensor 2000 PC goto system was a joy to use; I found it very user
friendly once I figured out what and where all the available settings
were. However, you don't need it for imaging.
The test configuration: AP Traveler 4" APO refractor; SBIG ST-8E camera; Maxim/DL software for camera control; The Sky for mount control. This combination yields 3 arc-seconds per pixel.
Sample guided image
Sample unguided image
Evaluation of guiding capabilities
Evaluation of use for unguided exposures
Polar Alignment Details
Adjusting backlash compensation accurately
Other GP-DX success stories
There are additional pictures taken with the GP-DX mount on my New Images page
GUIDED
IMAGE
Click on the image to see a larger version. Note that the stars are nice and round, with no evidence of guiding problems. To get this result, I studied the behavior of the the mount -- it is pretty aggressive when it moves during guiding, so you need to set the various parameters in the hand controller and camera control software to lower, less aggressive settings, to get good results. A very good polar alignment is also crucial to success.
UNGUIDED
IMAGE
The image at right, a close-up of a portion of the Pelican Nebula, was taken with the same setup as the guided image (Traveler, ST-8E). It was taken through high clouds and haze.
The image is a sum of 12 90-second images. Images combined, and digital development applied, in Maxim/DL. Contrast and levels tweaked in Photoshop 5.5. See my New Images page for additional images taken with this mount.

 With
some care on your part, you can coax one of these mounts to give you +/- 6
arc-seconds of accuracy during guiding (that was +/- 1 pixel for my 635mm
scope + ST-8E camera at 3 arc-seconds per pixel; you may be able to do better with longer focal
length scopes). In order to achieve this level of performance, you
will need to devote some time to learning, documenting, and interpreting
the mount's behaviors, but the reward is excellent guiding at an
economical (for an astrophotographic mount) price.
With
some care on your part, you can coax one of these mounts to give you +/- 6
arc-seconds of accuracy during guiding (that was +/- 1 pixel for my 635mm
scope + ST-8E camera at 3 arc-seconds per pixel; you may be able to do better with longer focal
length scopes). In order to achieve this level of performance, you
will need to devote some time to learning, documenting, and interpreting
the mount's behaviors, but the reward is excellent guiding at an
economical (for an astrophotographic mount) price.
The key to success with any mount used for guiding is in the setup, so one of the key questions to answer was: how effective is the mount's backlash controls? There was very minimal (basically undetectable) free play in the mount itself. However, when you install the SkySensor motors and gears, you need to take great care if you will be guiding, as it is up to you to establish a good and accurate physical connection between the motors and the mount -- a single bolt holds each motor in place. Use a straight-edge to get the gears lined up exactly in a straight line, and leave only a very small space between the gear teeth to avoid excess free play in the gear train. Don't make the gears too tight, however, or the motors will struggle! It would have been nice if the motor mounts were able to be adjusted with micrometer-like screws, but if you are careful you can get them to mesh accurately. I have included a section that covers details on gear adjustment and backlash settings.
The next step was to set the backlash for RA and Dec. I initially set these values based on testing by eye. The trick is to set RA so that there is neither a jerky start to movement in a new direction, nor any movement after releasing the button for RA movement. This should be done at around 12X or so. The trick in Dec is to find the sweet spot that gives you zero pause before motion in a new direction, but no jerkiness from too much backlash compensation.
However, when I set backlash compensation by eye this way, it wasn't accurate enough for guiding. In my initial attempts at guiding, the mount was extremely jumpy, wandering 15 or more pixels. I was worried! So I spent some time using Maxim/DL's excellent controls for moving the mount. I did lots of 1-second and 2-second movements, while making small adjustments to the backlash compensation for RA and Dec. The compensation had been set too high at first (the mount was jumping too far), and then I had it set too low (the mount would sit through numerous corrections before it actually moved). When I carefully adjusted the mount so that the 1-second movement was exactly half the distance of the 2-second movement (about 2 pixels or so), then I knew that I had zero delay (or the 1-second movement would be less than half), as well as no jerkiness (or the 1-second movement would be more than half). This method takes careful observation and an hour or more to pull off, but it's really the absolute best way to nail backlash compensation settings.
This got me within +/- 3 pixels (18 arc-seconds), so I still wasn't satisfied. At least the mount wasn't running wildly away from the guiding start point!
The next trick was to play around with the many, many settings Maxim/DL provides for mount control. After another couple of hours of testing, testing, and testing some more, I came to the conclusion that the overall goal with a mount like the GP-DX was to get the mount extremely well aligned to the pole, and to then do as little guiding as possible. This means using settings for aggressiveness, rate of movement, and duration of movement that are lower than the defaults:
- I changed the maximum move time from 3 seconds (big jump!) to .25 second. This eliminated wide excursions of the mount.
- I set the aggressiveness at 3, instead of the default 5.
- I calibrate the mount on a guide star for 15 seconds, instead of my usual 5 or 10. This tends to remove the influence of any remaining backlash in the calculated rate of movement for the mount's axes.
- I used a guide speed of .4X sidereal rate instead of the default .5X.
With these additional changes, I got the guide variations down to about one pixel plus or minus (3 arc-seconds either way, total wander 6 arc-seconds). At the focal length in use, 635mm, that was just one pixel. This rate cannot be extrapolated to longer focal lengths, since a longer focal length would also apply that longer focal length to the guide star's movements, and so the rate of increase in wander with increasing focal length is a non-linear relationship; doubling the focal length will not double the wander.
All in all, I think this establishes that the GP-DX makes a very good choice for a astro imaging. It tracks accurately enough for two-minute unguided exposures, and it guides accurately enough to have exposures as long as you need. The main thing to keep in mind is that you will need to devote some time initially to determine the optimal settings for your mount, and you will need to do a very good polar alignment each time out. The good news on polar alignment is that the polar scope is excellent, and typically provides 90-120 second unguided exposures without doing any drift alignment work.
There was almost no drift, maybe 2-3 star diameters! This is amazing to me, since I couldn't get that good of a polar alignment with my Astro-Physics 600 GTO mount using the built-in polar alignment software. I am just amazed, no other word for it.
There was slight drift, however, so I took two-minute exposures which gave me _perfectly_ round stars. A sample image of M13 shows this, as does an image of the Foxhead cluster
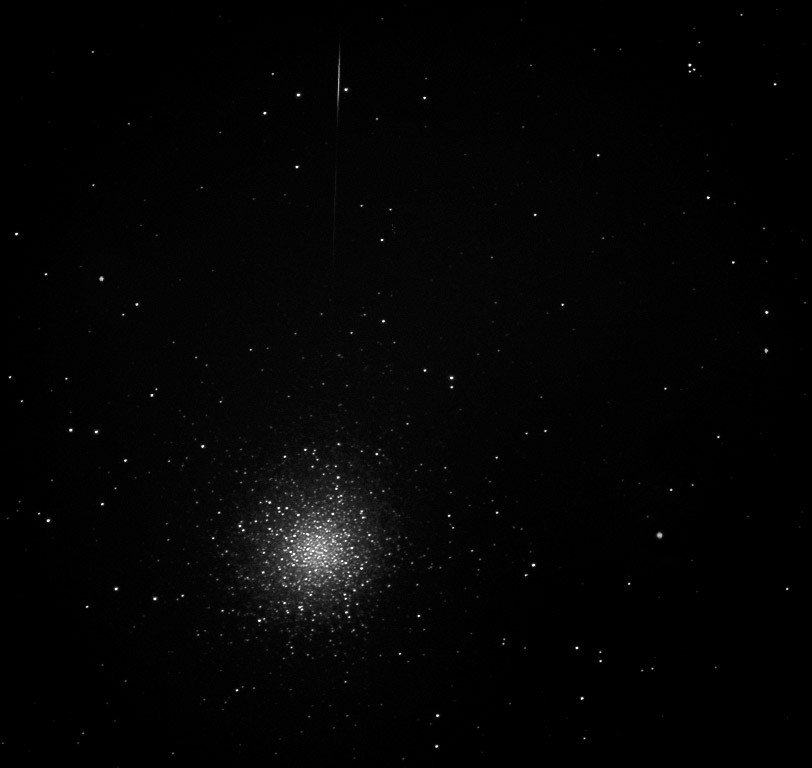
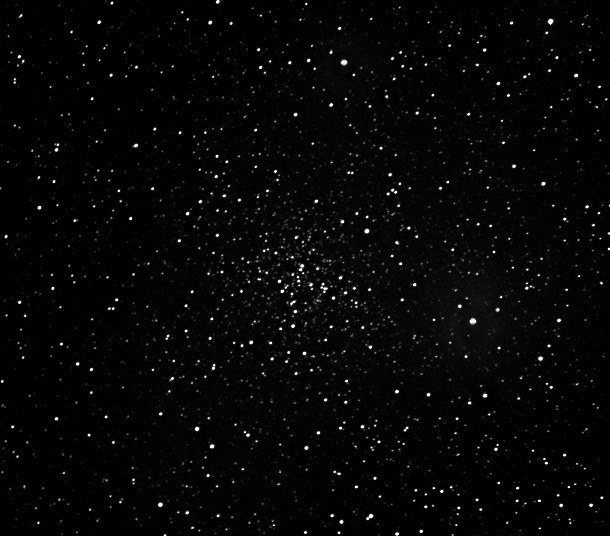
Both images are stacks of four or more individual images, each of which had perfectly round stars. This indicates good guiding consistency. Out of the 11 images I took of these two objects, only one had to be tossed due to star trails. The other interesting thing about these images is that they were taken through fairly heavy high clouds with a 3/4 moon high in the sky; CCD can really handle sky glow! We could see Vega, but not any of the stars in the constellation Lyra or Hercules. Extended objects like M27 were harder to image successfully over the sky glow, but I am going to stack those images and see what I managed to get.
After about an hour of slewing and tracking, I noticed that star trails started to increase, and this verifies what I suspected from the first night
out: this mount is an energy hog. I was on a marine battery, and it was being drawn down pretty fast. I switched to a three-amp plug-in power supply, and the star trails went away again. This is the only caution I could find about the mount -- make sure you have plenty of power for it.Either charge your battery up really well so it is delivering 13 volts or more, or use a hefty 12V power supply. I was also successful with a 2-amp power supply, but I feel that the results were a bit more reliable with the 3-amp.
I did try to tweak the polar alignment this time, just to see if the mount was capable of handling minor adjustments, and I was able to fine-tune the alignment better than I would have expected.
The conventional wisdom has been that you need the Losmandy G-11 mount to do imaging of any quality. There have been a number of folks doing good work on lighter mounts, and it _definitely_ helps to choose a scope of a relatively short focal length (say under 800mm), or to use a focal reducer to get under that number. You will still lose an image every now and then to star movement, which I believe is due to periodic error -- about one image in ten seems to get a little streaky, and has to be discarded. Training the built-in PEC of the SkySensor will solve that problem, but losing 1 image out of 10 is not bad at all if you elect to use the GP-DX without the SkySensor.
I would definitely recommend this mount to the budding astro imager as a competent "budget" mount for CCD imaging. It costs $999 for the mount alone, and the SkySensor 2000 PC adds another $1000.
 Here's
what I do to polar align my GP-DX. I get really good polar alignment with
this method. Good enough to do unguided imaging with, in fact, up to two
minutes with no star trails, at 700mm focal length. In the example below, the location of the
mount is presumed to be my home town of Duvall, WA, at longitude 122 west,
latitude 48 north. You will need to change the settings for your own
location, of course.
Here's
what I do to polar align my GP-DX. I get really good polar alignment with
this method. Good enough to do unguided imaging with, in fact, up to two
minutes with no star trails, at 700mm focal length. In the example below, the location of the
mount is presumed to be my home town of Duvall, WA, at longitude 122 west,
latitude 48 north. You will need to change the settings for your own
location, of course.
Note: Do this procedure before you attach telescope and counterweights, as you may need to turn the RA axis to places where you would never do it with a scope on the mount.
- You will need to know your approximate (to the nearest degree) latitude and longitude.
- Roughly align the mount to Polaris, using your latitude for the altitude setting. Move the tripod if necessary to make sure the adjustment screws for azimuth are about equal (so you can make adjustments in either direction as needed later during fine adjusting).
- To determine the longitude of your time zone's central meridian, multiple your GMT offset for standard time by 15. For Duvall, that would be 8 * 15 = 120.
- Calculate how far away you are from the central meridian for your time zone. For Duvall, that would be , or two degrees west of the central meridian. If your longitude is larger than the central meridian, you are west of it. If your longitude is smaller than the central meridian, you are east of it.
- There is a white-faced dial at the base
of the RA axis, labeled "Time Zone Center Offset Scale" in the
photo at right. There are two scales on it. an outer scale marked 1-12
which goes all the way around,
and a small partial inner scale marked:
E W
This time zone offset scale (the white dial) moves freely. Turn it so that the small white mark on the barrel of the polar scope (see photo) lines up with the number you calculated in step 3 (2 W in my case, which is just a tiny bit right of the "0" marker.). The scale is quite small, so you just have to approximate as best you can. - There is a black dial around the outside of the RA axis, labeled "RA Scale" in the photo. In normal use, this scale is used to indicate Right Ascension. For the purposes of polar alignment, this scale represents the time of day. Set this black dial so that zero is lined up with the pointer at the base of the RA Lock Screw, and then lock down the black dial using the set screw.
- The numbers on the white dial's outer scale represent the months of the year. The small tick marks between numbers represent the 10th and the 20th of each month. Determine the time of day, and today's date. Turn the RA axis until the date on the white dial and the time of day on the black dial line up with each other. For example, when I was aligning the polar axis on May 12, at 10pm PST (that is, it was 11pm daylight savings time!!!), I aligned the tick mark on the white dial for May 12 with the tick mark on the black dial for 22 hours. (In the photo, 1 am is lined up with November 17. Of course, 2am is lined up with November 1, and 11:30pm is lined up with December 10th, and so on -- you just need to worry about setting the current date and time!) Tighten the RA axis in place. You may have to put the mount into an awkward position at various times during the year to do this -- that's why the scope shouldn't be on the mount yet. For example, during the evening's first dark hours in the spring, the counterweight shaft is pointing quite high in the sky. You may have to move the mount into positions you usually do not go to! This is fine, at different seasons you will put the mount into whatever position is required to get the date and the hour to line up.
- The reticle inside the polar scope now accurately indicates where Polaris should be. You may need to consult the documentation for your mount to determine where the proper position for Polaris is inside that circle for the year 2000. If your mount is a recent one, the position for 2000 is exactly in the middle of the small circle. Use the Alt and Az adjustments to carefully position Polaris in the right place. You can twist the outer portion of the polar scope eyepiece to change focus on either the reticle or Polaris. If your mount does NOT have a reticle illuminator, hold a red flashlight near the edge of the entrance of the polar scope, and it will illuminate it sufficiently to see what you are doing.
Once you have Polaris in the proper place in the little circle, you are polar aligned and you can start using your mount. The whole procedure takes a couple of minutes once you get used to doing it.
Check out the color images taken with the Starlight XPress SXL-8 camera; they were guided with the GP-DX mount.

Bernie's page shows close-up images of the GP-DX with the JMI encoders. He has also included detailed information about installing the JMI encoders on the mount. include links to .
Visit Chris' Equipment page to find out out to increase the stability of tripods that come with the GP, GP-DX, and clones.
Visit Philip Neidlinger's site. He's using the GP-DX mount to take images with a Vixen R200SS 8" F/4 Newtonian reflector.
If you can get the physical backlash corrected with settings in the hand controller that do not exceed 150 units, then you have the gears in good shape. You can get this down to around 80 units if you are very, very careful, but this is hard to do as only a single bolt holds the motor and it's gear in place. Alignment to such a high degree requires a deft touch, but it can be done.
I tried calibrating the backlash visually, but I found that this was not nearly good enough for guiding purposes. I have Maxim/DL, and it has a Move button in the Guide or Focus dialog which you can use to get very good precision on the backlash settings in the hand controller. You want to be able to move the mount in + and - directions equally for equal intervals of time. Short intervals are most useful here. You may want to bump the guide speed up to .75X from .5 X for this testing. For example, put a suitable guide star on the guide chip. Now move the mount in + direction (X or Y, whichever one you want to do first) for 5-10 seconds to make sure you have taken up all the slack. Now move 1 second (or less, if you have a long focal length) in the minus direction. Note the number of pixels moved. (If there is no movement, you have not yet added sufficient backlash compensation; increase it, and begin again. A short time interval is also useful for determining if there is any remaining uncompenstated backlash.) Now move in + direction for the same time interval. The number of pixels moved should be the same. If it is not, then you must increase/decrease backlash compensation on the hand controller and retest. Continue until you get the same motions.
Repeat for other axis.
Verify lack of backlash by using a very short move interval at a longer focal length.
You may see variations in backlash compensation requirements when pointing at different areas of the sky. You can use the Maxim backlash compensation to handle these variations. I recommend that you make note of these variations, and if they are consistent and repeatable, you can use your notes to preset for various areas of the sky. I thought that the GP-DX was more prone to have these variations than other mounts I have used; perhaps my experiences were unique but if it happens to you...
By the end of this procedure, you will have a very good understanding of your mount's behaviors. If for any reason you remove the motors and remount them, you will have to repeat the procedure. This will give you excellent guiding results with the GP-DX.
The GP-DX is also very sensitive to the weight of cables and the like; if they are hanging, or are free to move very much as the scope moves, then you will get spurious variations in backlash, suddent starts and stops of the mount, or worse. The usual recommendation to run cables from the camera along the telescope to the mount, and then down to the ground, applies especially to the GP-DX. It also has fair number of protrusions which have a tendency to catch cables, as well as a few points where a cable can get trapped and pinched, to the point of cable failure!